Inkscape Extension for Automatic Pattern Making: Unroll Path
A extension for Inkscape that takes a path and outputs a straight line from it, optionally adding width and offset (e.g. a seam allowance) to it. Nearly 1-click pattern making.
Get the extension for free and open source at Github

Support the development of more free tools
These free tools take up a large amount of my limited personal time, so any support is greatly appreciated!
Example Video
Installation
Add the .inx and .py files to your Inkscape user extensions folder. You can find this by opening Inkscape Preferences (Edit-Preferences) and selecting the System tab. Restart Inkscape and the extension will appear under Extensions – Prickly Gorse – Unroll Path to Straight Path.
Usage
Select your path (or multiple individual paths) and run the extension (Extensions – Prickly Gorse – Unroll Path to Straight Path).
Shapes need to be converted to paths (Object – Object to Path).
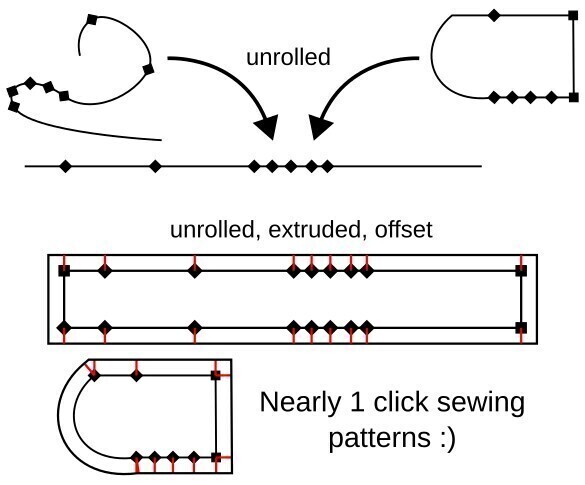
The extension can either generate a new straight path with the nodes at the same spacings, number the nodes, label segment lengths, extrude the line to a 2D shape, and add an offset to the extruded shape. You can chose the units, decimal precision, and label prefixes.
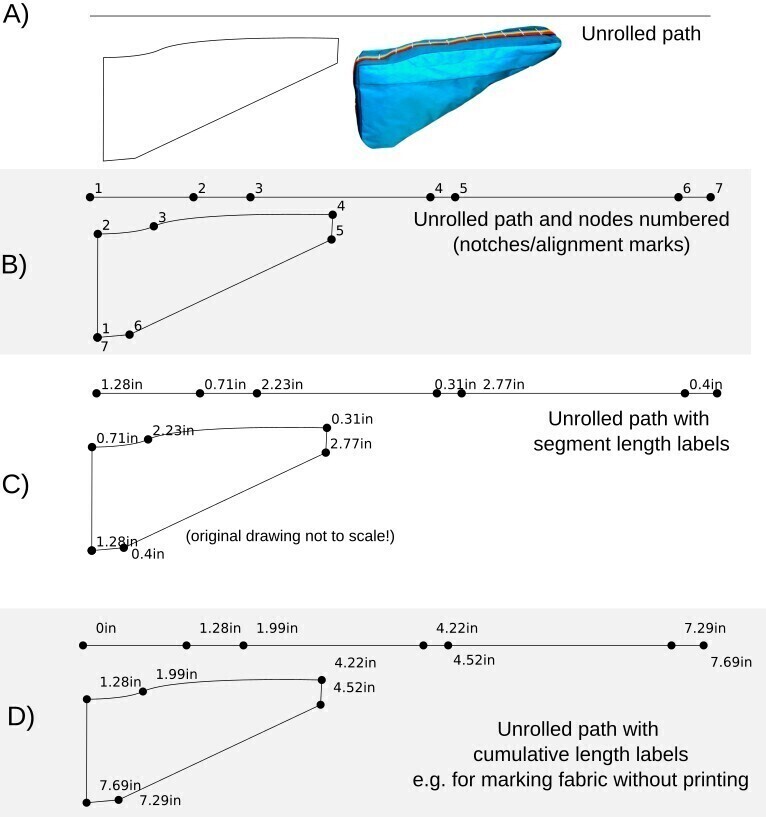
This produces a line slightly above the original path’s bounding box that is the total length of the path, with nodes placed the same distances along as on the original path. You can generate either a single line (A), a line and an extra group with numbered nodes (B) or labelled segment lengths in the units of your choice (C, D). You can add a label prefix, for example if making a top and bottom line.
Numbered nodes are useful if you can’t remember which node aligns with which on the original shape. If you have drawn the original path in the wrong order and don’t like your starting node, chose your new starting node and use the ‘Break Path at Selected Nodes’ tool, then re-run the extension. Or trace over your old shape with a new path, which is a bit more reliable if you want to keep it a closed shape.
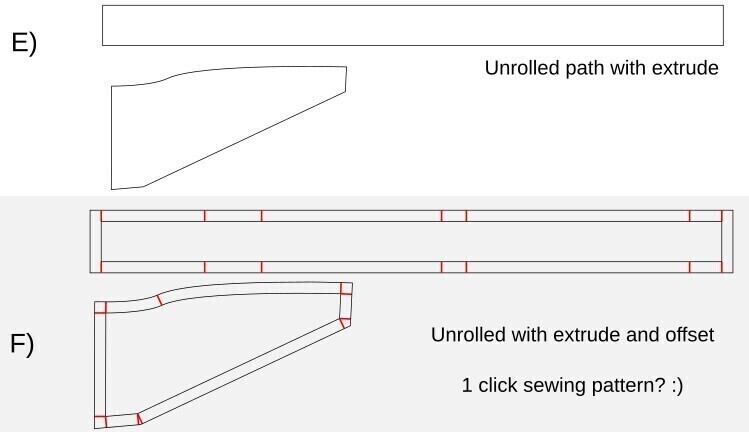
But we are on MYOG Tutorials, so you probably are using this to help making sewing patterns. Using the offset and extrude options (E,F), you can make a complete sewing pattern with just a click
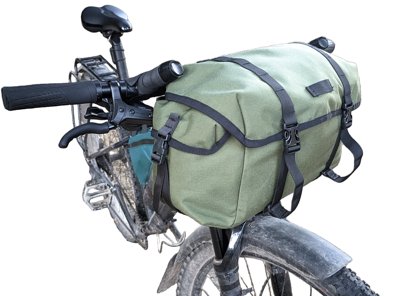
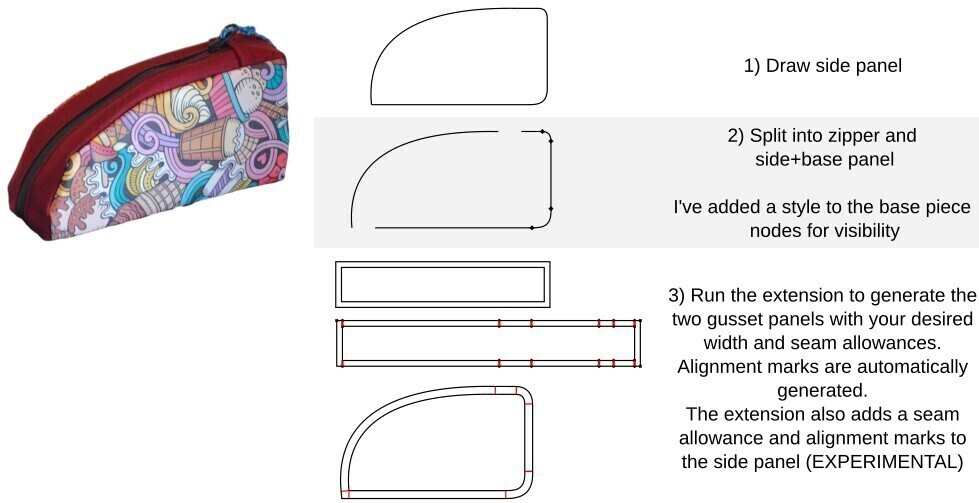
Top Tube Bag Example
Known Issues
Adding offset (seam allowance) to the original shape is still a bit experimental, and the offset path can sometimes be inside the original shape, or the ticks might be instead. You might need to reverse the path. Alignment marks are always added perpendicular to the path, so sharp corners will have two marks.
Sometimes the generated paths might be placed on the wrong position on the canvas, depending on how you selected the path within groups. If this happens, exit out of the group, and reselect. Don’t use CTRL+click to select into groups before running the extension.
I’d love to see the awesome stuff you make with the extension!
Contact me on the social media links at the top of the page (#pricklygorse) or contact form at the top of the page 🙂