It is easy to get lost in the details, so instead of repeating excessively detailed articles found elsewhere, this is a quick guide to just get you going.
Check out the MYOG Suppliers page for recommended places to order high-quality needles and thread for making your own gear.
I do nearly all my sewing with size 14/90 to 110/18 universal needles and continuous filament nylon or polyester thread, sizes Tex 50 to 75. Let's unpack this!
Needles
Needles come in a variety of point types and in two numbering systems for their thickness.
| European Size | American Size |
|---|---|
| Narrower Needles for lightweight fabrics/thin fabric stacks | |
| 60 | 8 |
| 70 | 10 |
| 80 | 12 |
| 90 | 14 |
| 100 | 16 |
| 110 | 18 |
| Thicker Needles for heavier weight fabrics/thick fabric stacks | |
Size 80/12 is good for ultralight fabrics, lightweight clothing, and tarp fabrics. 90/14 is a good size for lightweight technical bag fabrics such as XPAC or 210D gridstop. 100/16 is ideal for heavier fabrics like Cordura. The 100/16 size is typically the limit for most domestic sewing machines.
For best stitch quality, you should match the needle size to the fabric, but honestly, I tend to just leave a 100/16 in my machine for sewing anything, as most of my sewing is with heavier fabrics.
There are a huge variety of needle point types. Typically, a good quality Universal, Denim, or Microtex (Sharp) needle will be all you need for most MYOG projects, so don’t stress it too much. If you are having stitch issues when using stretchy fabrics, consider trying a ballpoint needle.
My last point on needles is that they are consumables. Replace them every 10-ish hours of sewing, or when starting a new large project like a backpack. If your stitch quality is poor (skipping stitches, non-straight stitches, rough holes, or a ‘punchy’ sound when sewing), your first troubleshooting step should always be a new needle.
Thread
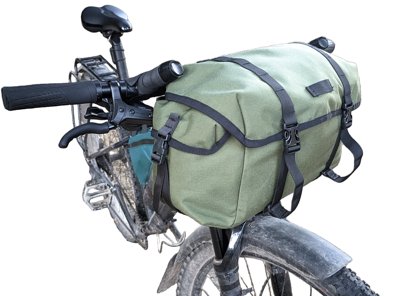
Avoid cotton thread for most MYOG projects unless you are aiming for a traditional aesthetic, such as with Carradice-style bike saddle bags.
There are many ways to measure thread thickness. I personally look for the Tex number, which increases with thread thickness and strength. You want to match your thread size to your needle size, and therefore also your fabric weight. Too thick a thread in an ultralight fabric can cause puckering and can look aesthetically out of place. Most home machines can’t handle anything thicker than roughly Tex 70.
- Corespun thread has a soft, fuzzier appearance similar to cotton.
- Continuous filament thread has straight fibers and is typically stronger, more abrasion-resistant, and sometimes easier to sew with than corespun.
- Bonded thread has a thin coating that helps prevent fraying and allows for sewing at much higher speeds in industrial settings. You can see a nice demonstration of the difference between bonded and unbonded thread in this video.
Tip: Matching the thread color to the fabric color is helpful to hide untidy stitching when you’re starting out!
Here are a few examples of Gutterman thread:
| Thread Name | Tex | Needle Size | Uses |
|---|---|---|---|
| Continuous Filament | |||
| Tera 80 | 35 | 70/10 to 90/14 | Tarps, ultralight fabrics |
| Tera 60 | 50 | 90/14 to 100/16 | My favorite all-rounder |
| Tera 40 | 75 | 100/16 to 110/18 | Backpacks, bike bags, heavy fabrics |
| Tera 30 | 100 | 110/18 to 120/20 | Heavy canvas, upholstery, sails |
| Core Spun | |||
| Mara 100 (Sew-all) | 30 | 70/10 to 90/14 | Tarps, ultralight fabrics |
| Mara 70 | 40 | 90/14 to 100/16 | General purpose |
| Mara 50 | 60 | 100/16 to 110/18 | Backpacks, heavy fabrics |
Sometimes a thread has a generic name:
| Thread Name | Tex | Needle Size | Uses |
|---|---|---|---|
| V46 (#46) | 45 | 90/14 to 100/16 | Tarps, ultralight fabrics, all-rounder |
| V69 (#69) | 70 | 100/16 to 120/18 | Backpacks, heavy fabrics |
| V92 (#92) | 90 | 110/18 to 130/20 | Heavy canvas, upholstery, sails |
Thread Spools and Stands
Thread is wound onto spools in two ways:
- Stacked is simply wound in neat rows/lines, and these spools should be placed on the horizontal pin on the top of your machine.
- Cross-wound spools and cones have thread that is wound in a criss-cross way. These are designed to be pulled from the top.

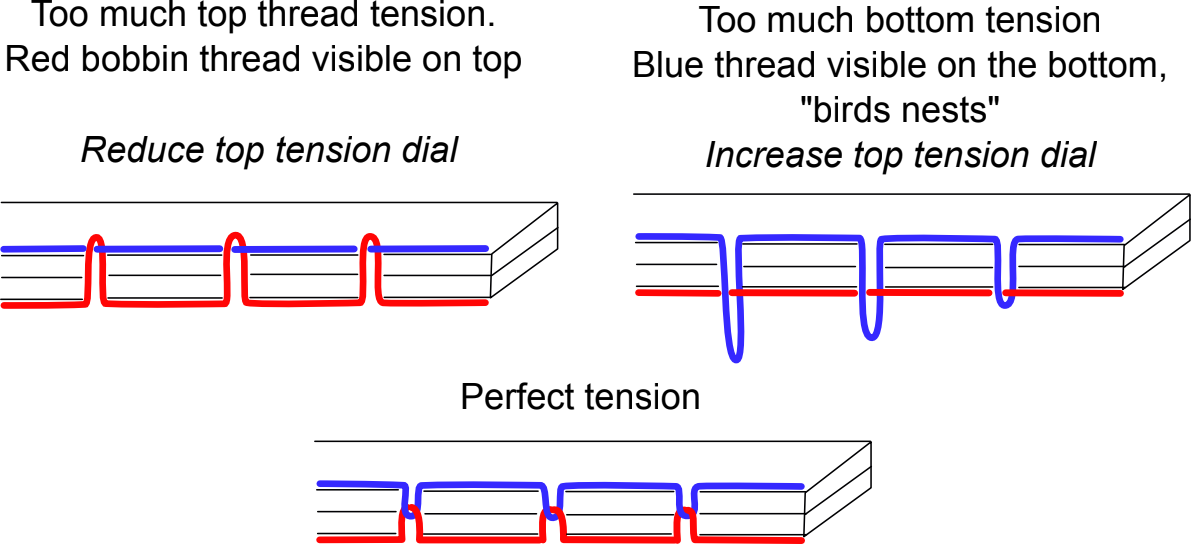
Thread Tension
Your top and lower (bobbin) threads should meet in the middle of the fabric to form a well-balanced stitch, as shown in the figure below. This creates a stronger seam that is less likely to break, and any breakage is less likely to propagate along the entire seam. You can alter the top tension by turning the numbered dial on your machine. Bobbin tension is usually a set-and-forget adjustment, unless you make large changes to your setup, such as using a significantly different thread size. Consult your sewing machine manual if unsure.
You will need to regularly check and adjust the tension when changing the thickness of your seam (e.g., sewing through more or fewer layers). Fabric scraps are ideal for testing your tension settings before committing to your project. One easy way to dial in your tension is to set the top tension to zero, sew a few stitches (be careful of thread making a knot below the fabric at low tension), increase it to 1, sew a few more, and so on. You will be able to visually see where the bobbin thread is being pulled up to the top as the tension gets too high.
This article contains affiliate links to quality products from reputable MYOG companies to help support this site, at no extra cost to yourself.