When starting out it is easy to get overwhelmed by the huge variety of zips available to you. This article will help you navigate these essential components of many projects, and enable you to choose the exact type you need for your own project.
Buying Zippers: Length and Customisation
When purchasing zippers, it’s often more practical to buy them by the metre rather than in fixed lengths. This gives you the flexibility to cut the zipper to the exact size you need. After cutting, sew the ends of the zipper closed to prevent fraying, and you can even melt the teeth together slightly for added security.
Zip Sizes
Choosing the correct size for your project is essential for long term durability. You’ll need to balance your specific needs for durability and aesthetics to get the correct zip size.
A size #3 zipper has 3mm wide teeth, good for ultralight stuff sacks and clothing.
Size #5 has 5mm wide teeth and is the most common size you’ll find on most outdoor gear.
Size #8 to #10 are the strongest (and bulkiest), and best for projects like bikepacking frame bags and structural zippers on travel backpacks that will take a lot of stress and dirt.
Zip Teeth and Sliders
The two main zipper teeth types are coil and moulded tooth (vislon), and have different benefits and disadvantages for certain projects.
- Coil zips: Known for their flexibility, coil zippers are excellent for applications where the zipper needs to curve around shapes, such as in jackets or bags with rounded corners. They are also widely available in various colors and provide a smooth opening and closing action.
- Moulded tooth: While less smooth than coil zippers, these are sturdier and more resistant to dirt and grime, making them a better option for rugged environments, such as on outdoor gear (e.g. bikepacking bike frame bags). However, they don’t work well with curved seams because they are much stiffer.
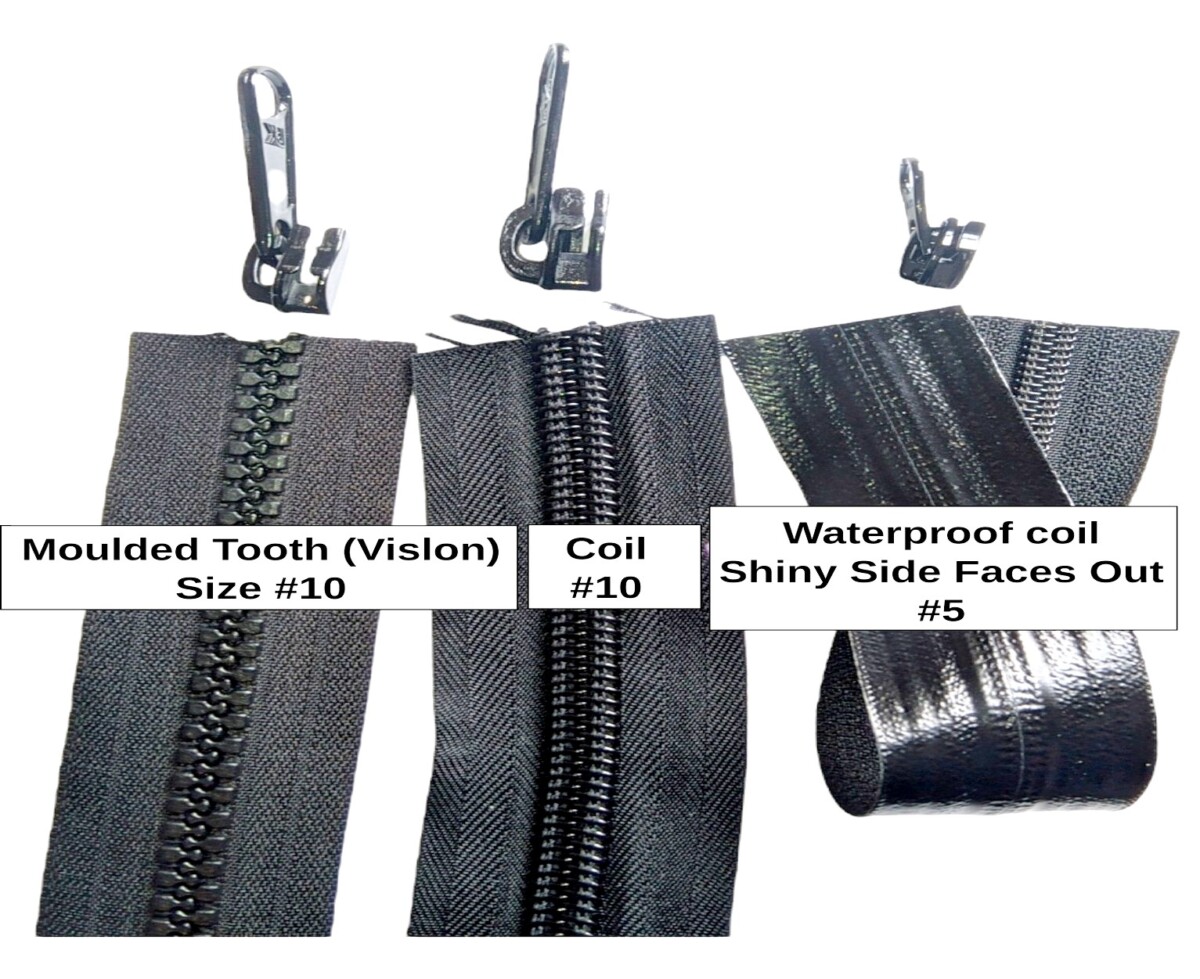
The slider also needs to match the type of teeth and sometimes the zipper coating (e.g. waterproof). For instance, a coil zipper has its teeth on top of the tape, so its slider has the notch lower on the slider body. Molded tooth zippers have their teeth centered, requiring a centered notch in the slider. This means sliders zip teeth types are not interchangeable.
Waterproof Zips
‘Waterproof’ coil zips like YKK Aquaguard have a coating on the underside of the zip which faces outwards on the bag/garment, which means what is the underside of a normal coil zip is actually the right side of waterproof zip. This means they need a ‘reverse slider’/ ‘waterproof zip slider’, which are upside down to a normal coil slider (the tape notch is towards the top of the slider). A normal slider will usually actually fit, but you might not realise your mistake until you finish your bag and see that your zip on the wrong-side of the bag!
The flip side to this is that you can use a reverse slider on a normal coil zip if want the teeth hidden towards the inside of your bag or garment. This can give a nice aesthetic to your project.
Cheap off-brand waterproof zips aren’t worth it in my experience and will delaminate within days. Buy genuine YKK Aquaguard from a reputable seller.
Zipper sewing techniques
Zipper Ends
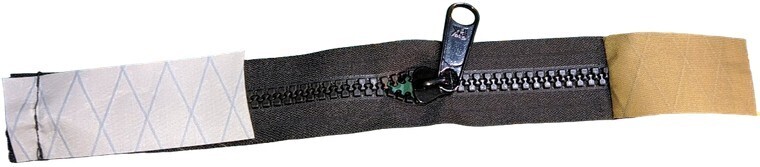
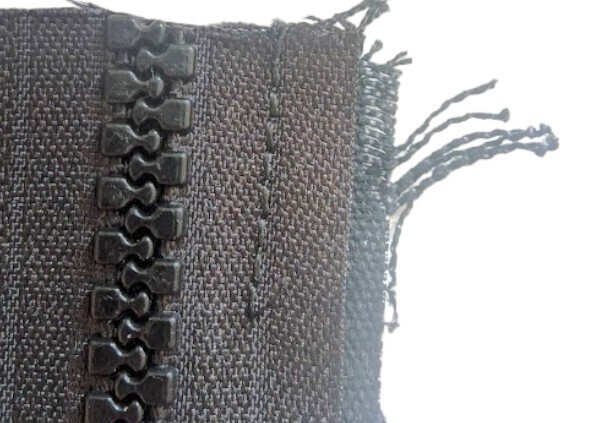
Zippers don’t handle tight corners well, even flexible coil zippers. To avoid distorting the shape of your bag, sew a small piece of fabric at the zipper ends. This fabric should extend past the end of the zipper and be sewn into the seam allowance of your bag, instead of the zipper itself. Allow for about half an inch of seam allowance and reinforce the area with a triple stitch to ensure durability. Avoid stitching directly onto the teeth, especially for moulded tooth zippers, as this can break your needle.
Sewing the zipper to the fabric
- Coil zippers: The teeth should touch the fabric, with the smooth tape facing up.
- Waterproof zippers: Sew them upside down with the shiny side of the tape facing the fabric’s right side, and the teeth pointing upwards.
- Molded zippers: Orientation is less critical as their teeth are centered on the tape.
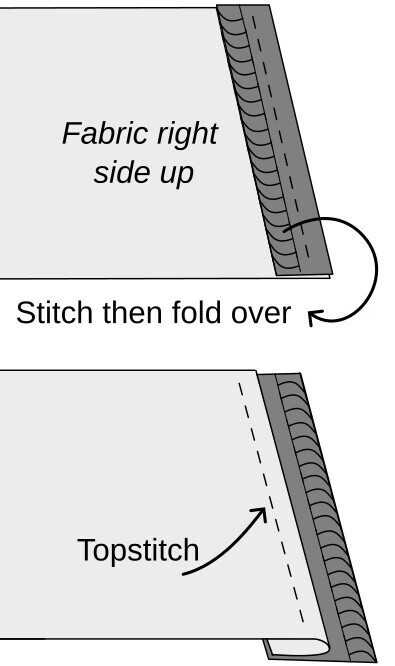
Once the zipper is sewn in place with the required seam allowance, fold the fabric over along the seam line and add a topstitch to keep the seam flat. If you want to further secure the raw edge, you can bind it with grosgrain or finish it with a zig-zag stitch before folding and sewing the top stitch
Zipper Seam Allowance
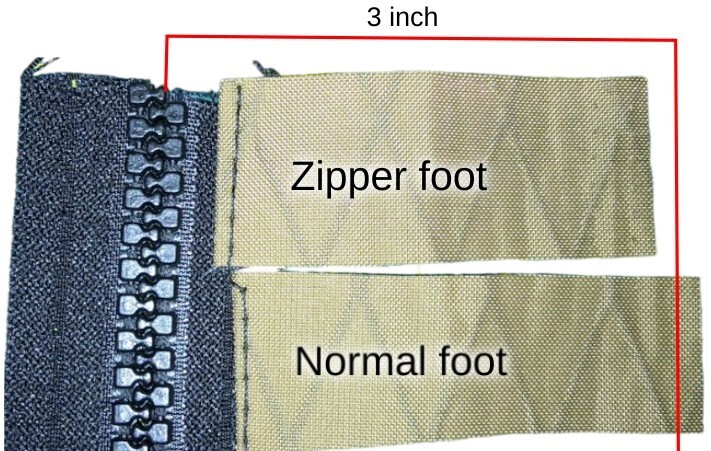
You might notice after sewing a zip that the width of your panel has changed. The seam allowance you use (how close to the zipper teeth that you sew) affects how much fabric is taken up when sewing a zipper.
The easiest way to make sure your panel maintains the same width (and is easier to design for when making your own patterns) is to sew directly down the middle of the half of the zipper tape you are working on. Is might not always be possible if your sewing machine’s presser foot is too wide, or if you are using a zipper foot and want to sew closer to the teeth.
Some of our patterns may include a zipper seam allowance to account for extra fabric required to maintain a specific panel width when the item is sewn.
Assuming a #10 zip tape is 38 mm (1.5 inch) wide, divide by 4 (9.5 mm/ 3⁄8 inch) to get the seam allowance you need to sew along to maintain the same panel width without adding/removing fabric.
If your fabric is prone to fraying, such as cotton canvas, allow extra seam allowance for your zippers and/or bind the edge before folding over and top stitching. The majority of zipper failures I’ve experienced are from the seam allowance frying and the zip pulling out, not the zipper itself failing. Binding the raw edge with binding tape will also help increase longevity.
Zipper Garage
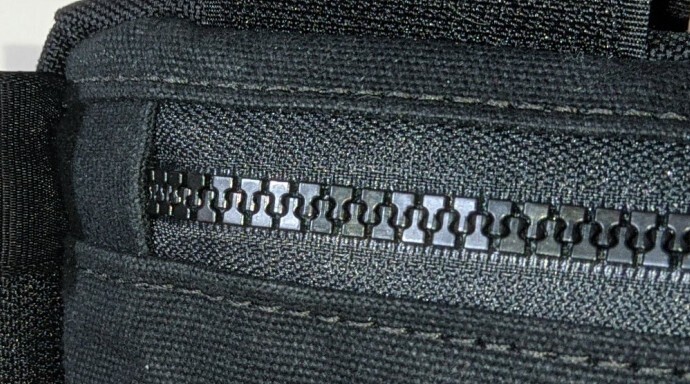
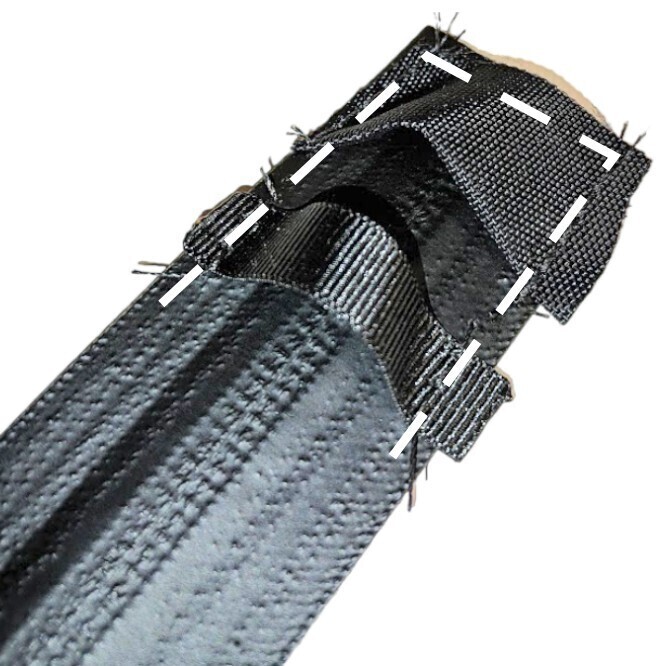
A zipper garage is a small flap of fabric sewn at the end of the zipper track. It covers the small gap where the zipper can’t fully close, providing both a cleaner aesthetic and some protection against water seepage. This is a simple but effective detail often found on higher-end bags and can be a nice finishing touch to your project.
Construction is super simple, just a folded over flap of fabric sewn as close to the edge as the zip as possible.The ribbon below is a pick pocket theft protector
Zip garages are one of many of the unique features in the MYOG Tutorials travel backpack series, such as the TRVL 20L Travel Backpack sewing guide to give a professional, store bought finish.
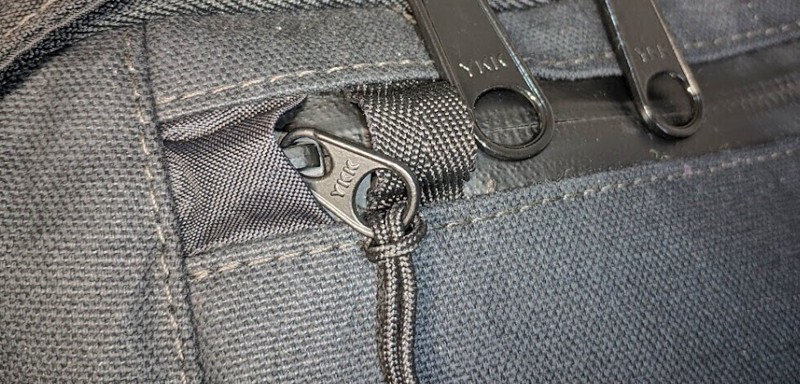
The horizontal zip sits neatly in the flap of fabric, the zipper garage. Next to this is a piece of webbing to help stop pickpockets steal the contents from the TRVL 20L Backpack
Zip Repair
Knowing how to repair your gear is a super liberating feeling, and helps keep objects (and your hard work!) out of landfill.
Stiff Zips
You can buy zipper lubricant, or cheaper household alternatives. Drawing along the zip with a pencil to get the graphite into the teeth is a quick and easy fix. Wax, bike chain lubricant, many other options also. Some are more likely to attract dirt than others, so occasionally cleaning the zip is recommended.
Burst Zip
This often happens when the slider gets worn and can’t add enough tension to close the zipper. This can be easily fixed to give your gear more life.
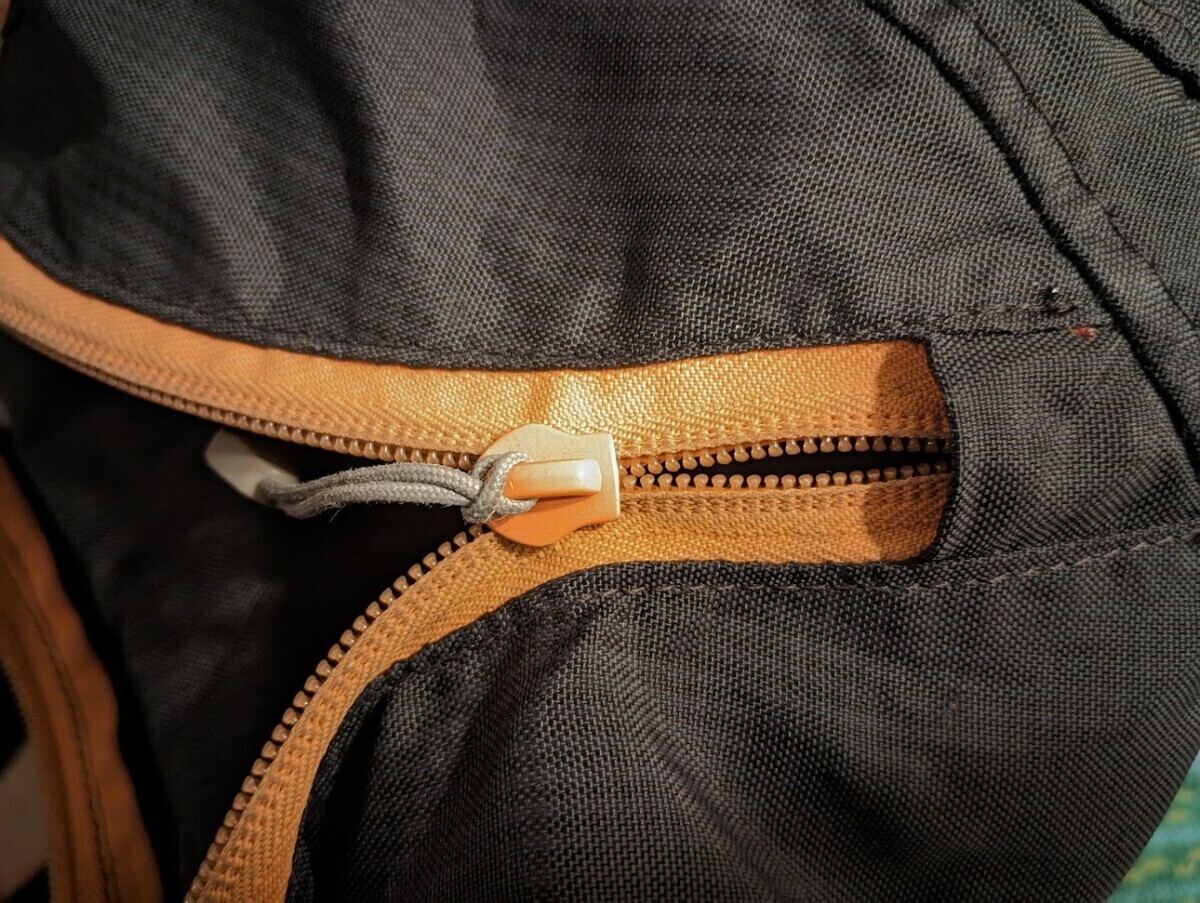
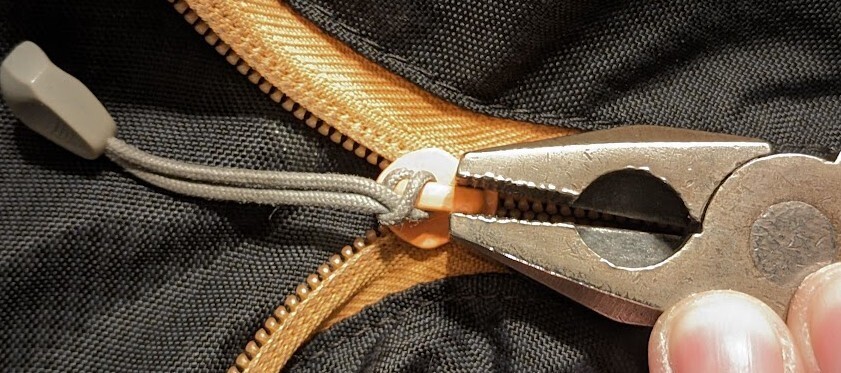
Gently crimp the two sides of the zip to bend the slider shape slightly tighter. A easy way to evenly bend both sides is place pliers on the slider and gently tap the pliers.
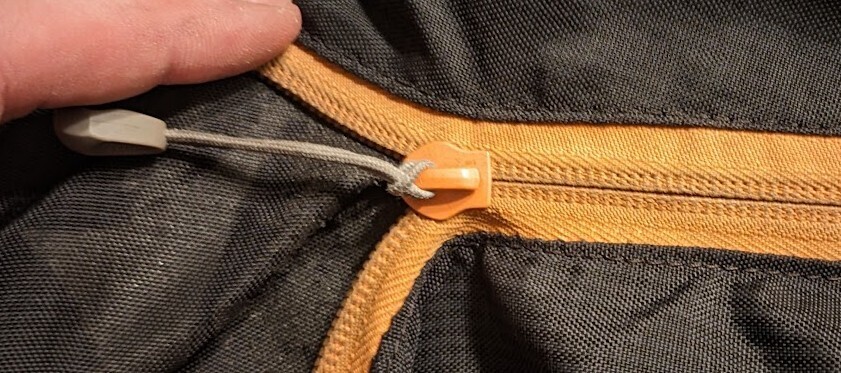
Gently bend the slider, and check if it works before deciding to bend more
Super easy fix
Slider Fallen Off
You can sometimes carefully use a flat headed screwdriver in the side slots to carefully bend open the slider enough to reattach it, then re-crimp it.
Failing this, you can remove a zip stopper, slide a slider on, and add a new zip stopper.
If the zip ends are both sewn in you might need to seam rip just enough to get a slider onto the tape.
If the zip is long, it can be easier to sacrifice a small amount of the zip by cutting the tape near one end enough to slide a slider on, and sewing the bottom of the tape together so the slider cannot slide back off.